Quote from: burn_654 on 11/30/2011, 11:08 PMI have to ask, do you think this has any potential for repro's? Could the flash chip be burned with an eeprom burner?Yes, you can use an eprom burner.
This is neat stuff!
RIP to BT Garner of MindRec.com... BT passed away early 2023 from health problems. He was one of the top PCE homebrew developers and founder of the OG Turbo List, then PCECP.com. Condolences to family and friends.  |
This section allows you to view all posts made by this member. Note that you can only see posts made in areas you currently have access to.
Pages1
#1
 Console Repair/Mod Center / Re: PC Engine Homemade Flash Cart
12/02/2011, 07:54 AM
#2
Console Repair/Mod Center / Re: PC Engine Homemade Flash Cart
11/13/2011, 06:12 AM
Now i'm thinking in combining 2 x 512k flash chips. I can do it like on snes:
http://nintendoallstars.w.interia.pl/romlab/139tomad.htm
But i don't know how to do it on the programmer side...
http://nintendoallstars.w.interia.pl/romlab/139tomad.htm
But i don't know how to do it on the programmer side...
#3
Console Repair/Mod Center / Re: PC Engine Homemade Flash Cart
11/11/2011, 11:55 AM
Thanx for your kind words.
I know a commercial flash cart is better, it can hold more games, but it also costs $$$.
A megadrive 6 buttons controller to pc engine is possible. The six button controller schematic is available. But it's a lot of work and very few games use 6 buttons.
I know a commercial flash cart is better, it can hold more games, but it also costs $$$.
A megadrive 6 buttons controller to pc engine is possible. The six button controller schematic is available. But it's a lot of work and very few games use 6 buttons.
#4
Console Repair/Mod Center / PC Engine Homemade Flash Cart
11/11/2011, 07:25 AM
The boring introduction
First, sorry for my bad english.
When i first heard about PC Engine i belived it's something between a computer and a console, that's because of the name PC and i avoid it. But about 3 month ago i saw a picture of the system and i decided to get one. I found a loose and untested white pc engine for 30 USD including system. And wow, it's so small and nice! It's not as powerfull as SNES or mega drive, but it's a great system, expecialy for shmups. The system had 2 corroded traces between the cart connector and the ribbon cable. Easy fix. Also i did the RGB mod and amp from here: https://www.gamesx.com/grafx/pce_rgb.jpg

Works great on CRT, but on a 40 inch LED TV the picture was sometimes dark, sometimes bright, so i removed the amp from sync line and i used a 75R resistor. I also added a smd led on the power switch. The led is placed where the switch is painted in red. I don't have an official controller, but i modded a nes controller to work with pc engine:
https://mmmonkey.co.uk/nes-to-pc-engine-controller-mod/
https://web.archive.org/web/20191109000303/http://www.mmmonkey.co.uk/console/pce/pad.htm
Thing i still need to do:
1. Get rid of the jailbars. You can see them only on big a tv and only on certain colors. For exemple they are present in Street Figter at the bonus stage when you have to smash a car. I read somewhere that they are present because of the small caps inside the system.
2. I don't know if it's a problem with my 2 systems, but the audio is very low compared with snes and n64.
THE FLASH CART
I used a 512k flash (49f040 plcc32) because it's the biggest one i have.
It's recommended to use 1 mega because that way you can play all games except Street Fighter.
To make the flash cart is easy and hard at the same time. It's easy because the pc engine has all the pins that you need, hard because the cart it small and hard to work with it. So here's the pinout:
http://wiki.pcengine.info/pmwiki.php?n=HuCard.HuCardPinout
Pin 1 is the shortest one.
Note: When using 512k flash, A18 is on pin 33
Note 2: When using 512k flash you can play 256k and 512k games, but 284k don't work.
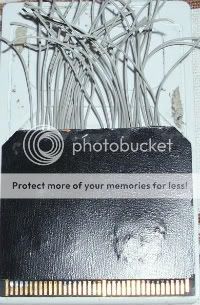
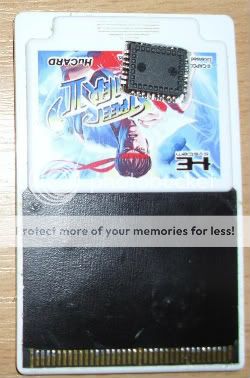
First thing you'll need is a donor cart. I used Street Fighter. The pcb of the game is the black thing you see on the white plastic. You need to remove the pcb usind a small screwdriver or a rezor blade.
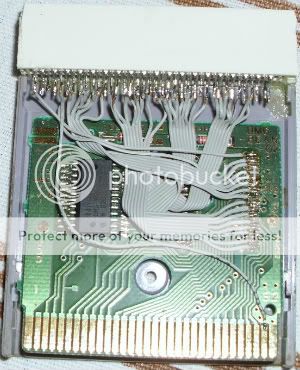
Now that you have the pcb is time to remove the chip(s) from it. The easyest way is to slowly bend the pcb until you see a piece of the epoxy chip lifting from the pcb. Insert a screwdriver under the expoxy chip and remove it.
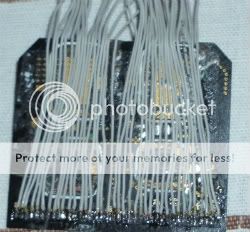
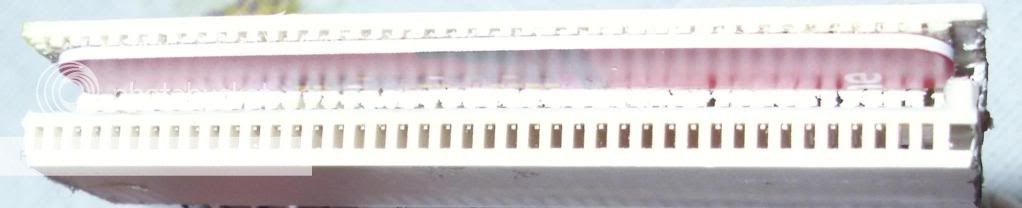
Next step is to soldier wires on the pins from the side where the chip(s) was. I used wires from a 80 wire ide cable.
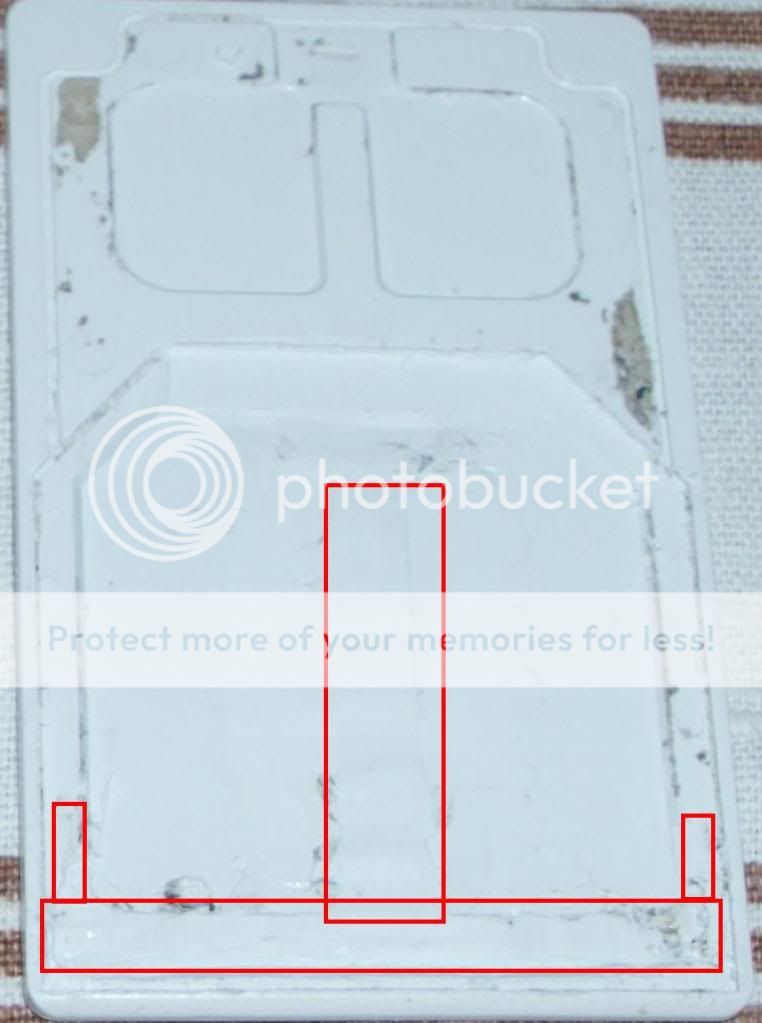
The next step is to modify the white plastic so the pcb can fit it. Use a razor blade to scrape the white plastic. Remove the plastic as marked. Make sure that on the bottom side you leave a little bit of plastic that will hold the pcb.
Connect the flash chip to the other end of the wires. This is the final result.
THE PROGRAMMER
You will need an universal eprom programmer and an adapter.
First you will need to make a cart connector. I used a pci slot (thanx chop5 for the info). Use a hot air gun to remove the pci slot from a computer motherboard.
Remove all the pins from one side. Pull the pins from the soldering side.
Cut the slot al the way on the red line. Throw away the small part.
Now comes the tricky part. We need to make the slot wider so cut on the blue line, but don't cut all the way down. Instead cut until you reach the depth of the original opening.
Now it's possible that the slot is a little wider. Cut a piece of a credit card and glue it inside. In Romania when you a buy a vodafone sim card, you get in something similar to a credit card that holds the pin and puk code. i used that.
You have now made a pc engine cart connector and it's time to wire it to a dip socket that will fit in your universal programmer. I don't have an universal programmer, but i have this:
https://web.archive.org/web/20180510235007/https://reinerziegler.de/readplus.htm#GB_Flasher
So i removed the rom in a gameboy cart and wired the pc engine cart connector to the place where the rom was.
That's all. It's quite easy. For me the hardest part was to modify the white plastic.
You can get a 1 mega flash here, but 13 euro for shipping ?
https://www.ebay.de/itm/6-St-AM29F080B-75SI-8-Megabit-Flash-SMD-E0858-/130400967259?pt=Bauteile&hash=item1e5c80da5b
First, sorry for my bad english.
When i first heard about PC Engine i belived it's something between a computer and a console, that's because of the name PC and i avoid it. But about 3 month ago i saw a picture of the system and i decided to get one. I found a loose and untested white pc engine for 30 USD including system. And wow, it's so small and nice! It's not as powerfull as SNES or mega drive, but it's a great system, expecialy for shmups. The system had 2 corroded traces between the cart connector and the ribbon cable. Easy fix. Also i did the RGB mod and amp from here: https://www.gamesx.com/grafx/pce_rgb.jpg
Works great on CRT, but on a 40 inch LED TV the picture was sometimes dark, sometimes bright, so i removed the amp from sync line and i used a 75R resistor. I also added a smd led on the power switch. The led is placed where the switch is painted in red. I don't have an official controller, but i modded a nes controller to work with pc engine:
https://mmmonkey.co.uk/nes-to-pc-engine-controller-mod/
https://web.archive.org/web/20191109000303/http://www.mmmonkey.co.uk/console/pce/pad.htm
Thing i still need to do:
1. Get rid of the jailbars. You can see them only on big a tv and only on certain colors. For exemple they are present in Street Figter at the bonus stage when you have to smash a car. I read somewhere that they are present because of the small caps inside the system.
2. I don't know if it's a problem with my 2 systems, but the audio is very low compared with snes and n64.
THE FLASH CART
I used a 512k flash (49f040 plcc32) because it's the biggest one i have.
It's recommended to use 1 mega because that way you can play all games except Street Fighter.
To make the flash cart is easy and hard at the same time. It's easy because the pc engine has all the pins that you need, hard because the cart it small and hard to work with it. So here's the pinout:
http://wiki.pcengine.info/pmwiki.php?n=HuCard.HuCardPinout
Pin 1 is the shortest one.
Note: When using 512k flash, A18 is on pin 33
Note 2: When using 512k flash you can play 256k and 512k games, but 284k don't work.
First thing you'll need is a donor cart. I used Street Fighter. The pcb of the game is the black thing you see on the white plastic. You need to remove the pcb usind a small screwdriver or a rezor blade.
Now that you have the pcb is time to remove the chip(s) from it. The easyest way is to slowly bend the pcb until you see a piece of the epoxy chip lifting from the pcb. Insert a screwdriver under the expoxy chip and remove it.
Next step is to soldier wires on the pins from the side where the chip(s) was. I used wires from a 80 wire ide cable.
The next step is to modify the white plastic so the pcb can fit it. Use a razor blade to scrape the white plastic. Remove the plastic as marked. Make sure that on the bottom side you leave a little bit of plastic that will hold the pcb.
Connect the flash chip to the other end of the wires. This is the final result.
THE PROGRAMMER
You will need an universal eprom programmer and an adapter.
First you will need to make a cart connector. I used a pci slot (thanx chop5 for the info). Use a hot air gun to remove the pci slot from a computer motherboard.
Remove all the pins from one side. Pull the pins from the soldering side.

Cut the slot al the way on the red line. Throw away the small part.
Now comes the tricky part. We need to make the slot wider so cut on the blue line, but don't cut all the way down. Instead cut until you reach the depth of the original opening.

Now it's possible that the slot is a little wider. Cut a piece of a credit card and glue it inside. In Romania when you a buy a vodafone sim card, you get in something similar to a credit card that holds the pin and puk code. i used that.
You have now made a pc engine cart connector and it's time to wire it to a dip socket that will fit in your universal programmer. I don't have an universal programmer, but i have this:
https://web.archive.org/web/20180510235007/https://reinerziegler.de/readplus.htm#GB_Flasher
So i removed the rom in a gameboy cart and wired the pc engine cart connector to the place where the rom was.
That's all. It's quite easy. For me the hardest part was to modify the white plastic.
You can get a 1 mega flash here, but 13 euro for shipping ?
https://www.ebay.de/itm/6-St-AM29F080B-75SI-8-Megabit-Flash-SMD-E0858-/130400967259?pt=Bauteile&hash=item1e5c80da5b

Pages1